Over the past year, our readers made this the #1 blog post. Thousands of pros have found it which tells us it is a HOT topic. We added a few new learnings to this version.
Conducting a site walk for an upcoming security system install or upgrade is a crucial step in the preparation process. A successful site survey will provide you with the answers to successfully create a system design for a proposal or for documentation. A poor site survey or lack of one can lead to great frustration for you and your clients alike.
Wondering if your site survey process could use some improvement? Consider these 8 essentials for conducting a site survey.
1. Start with a floor plan or satellite image
Before you move any further into the design process, the first step is to secure a floor plan of the site you’ll be surveying. Facility floor plans will be the most accurate representation of actual dimensions and may reveal hidden features or obstacles that your team wouldn’t notice on a site visit.
If you’re unable to secure a floor plan, you could use a satellite image from Google Maps. [System Surveyor lets you access Google Maps directly from the app and will auto-set the scale.] Another common option is to take a picture of a fire escape plan. For other ideas of how to get a floor plan, check out our blog post on the topic.
The point here is to get the best possible representation of the building into digital form. With this step complete, you’ll be in a much better place to build out a physical security system design.
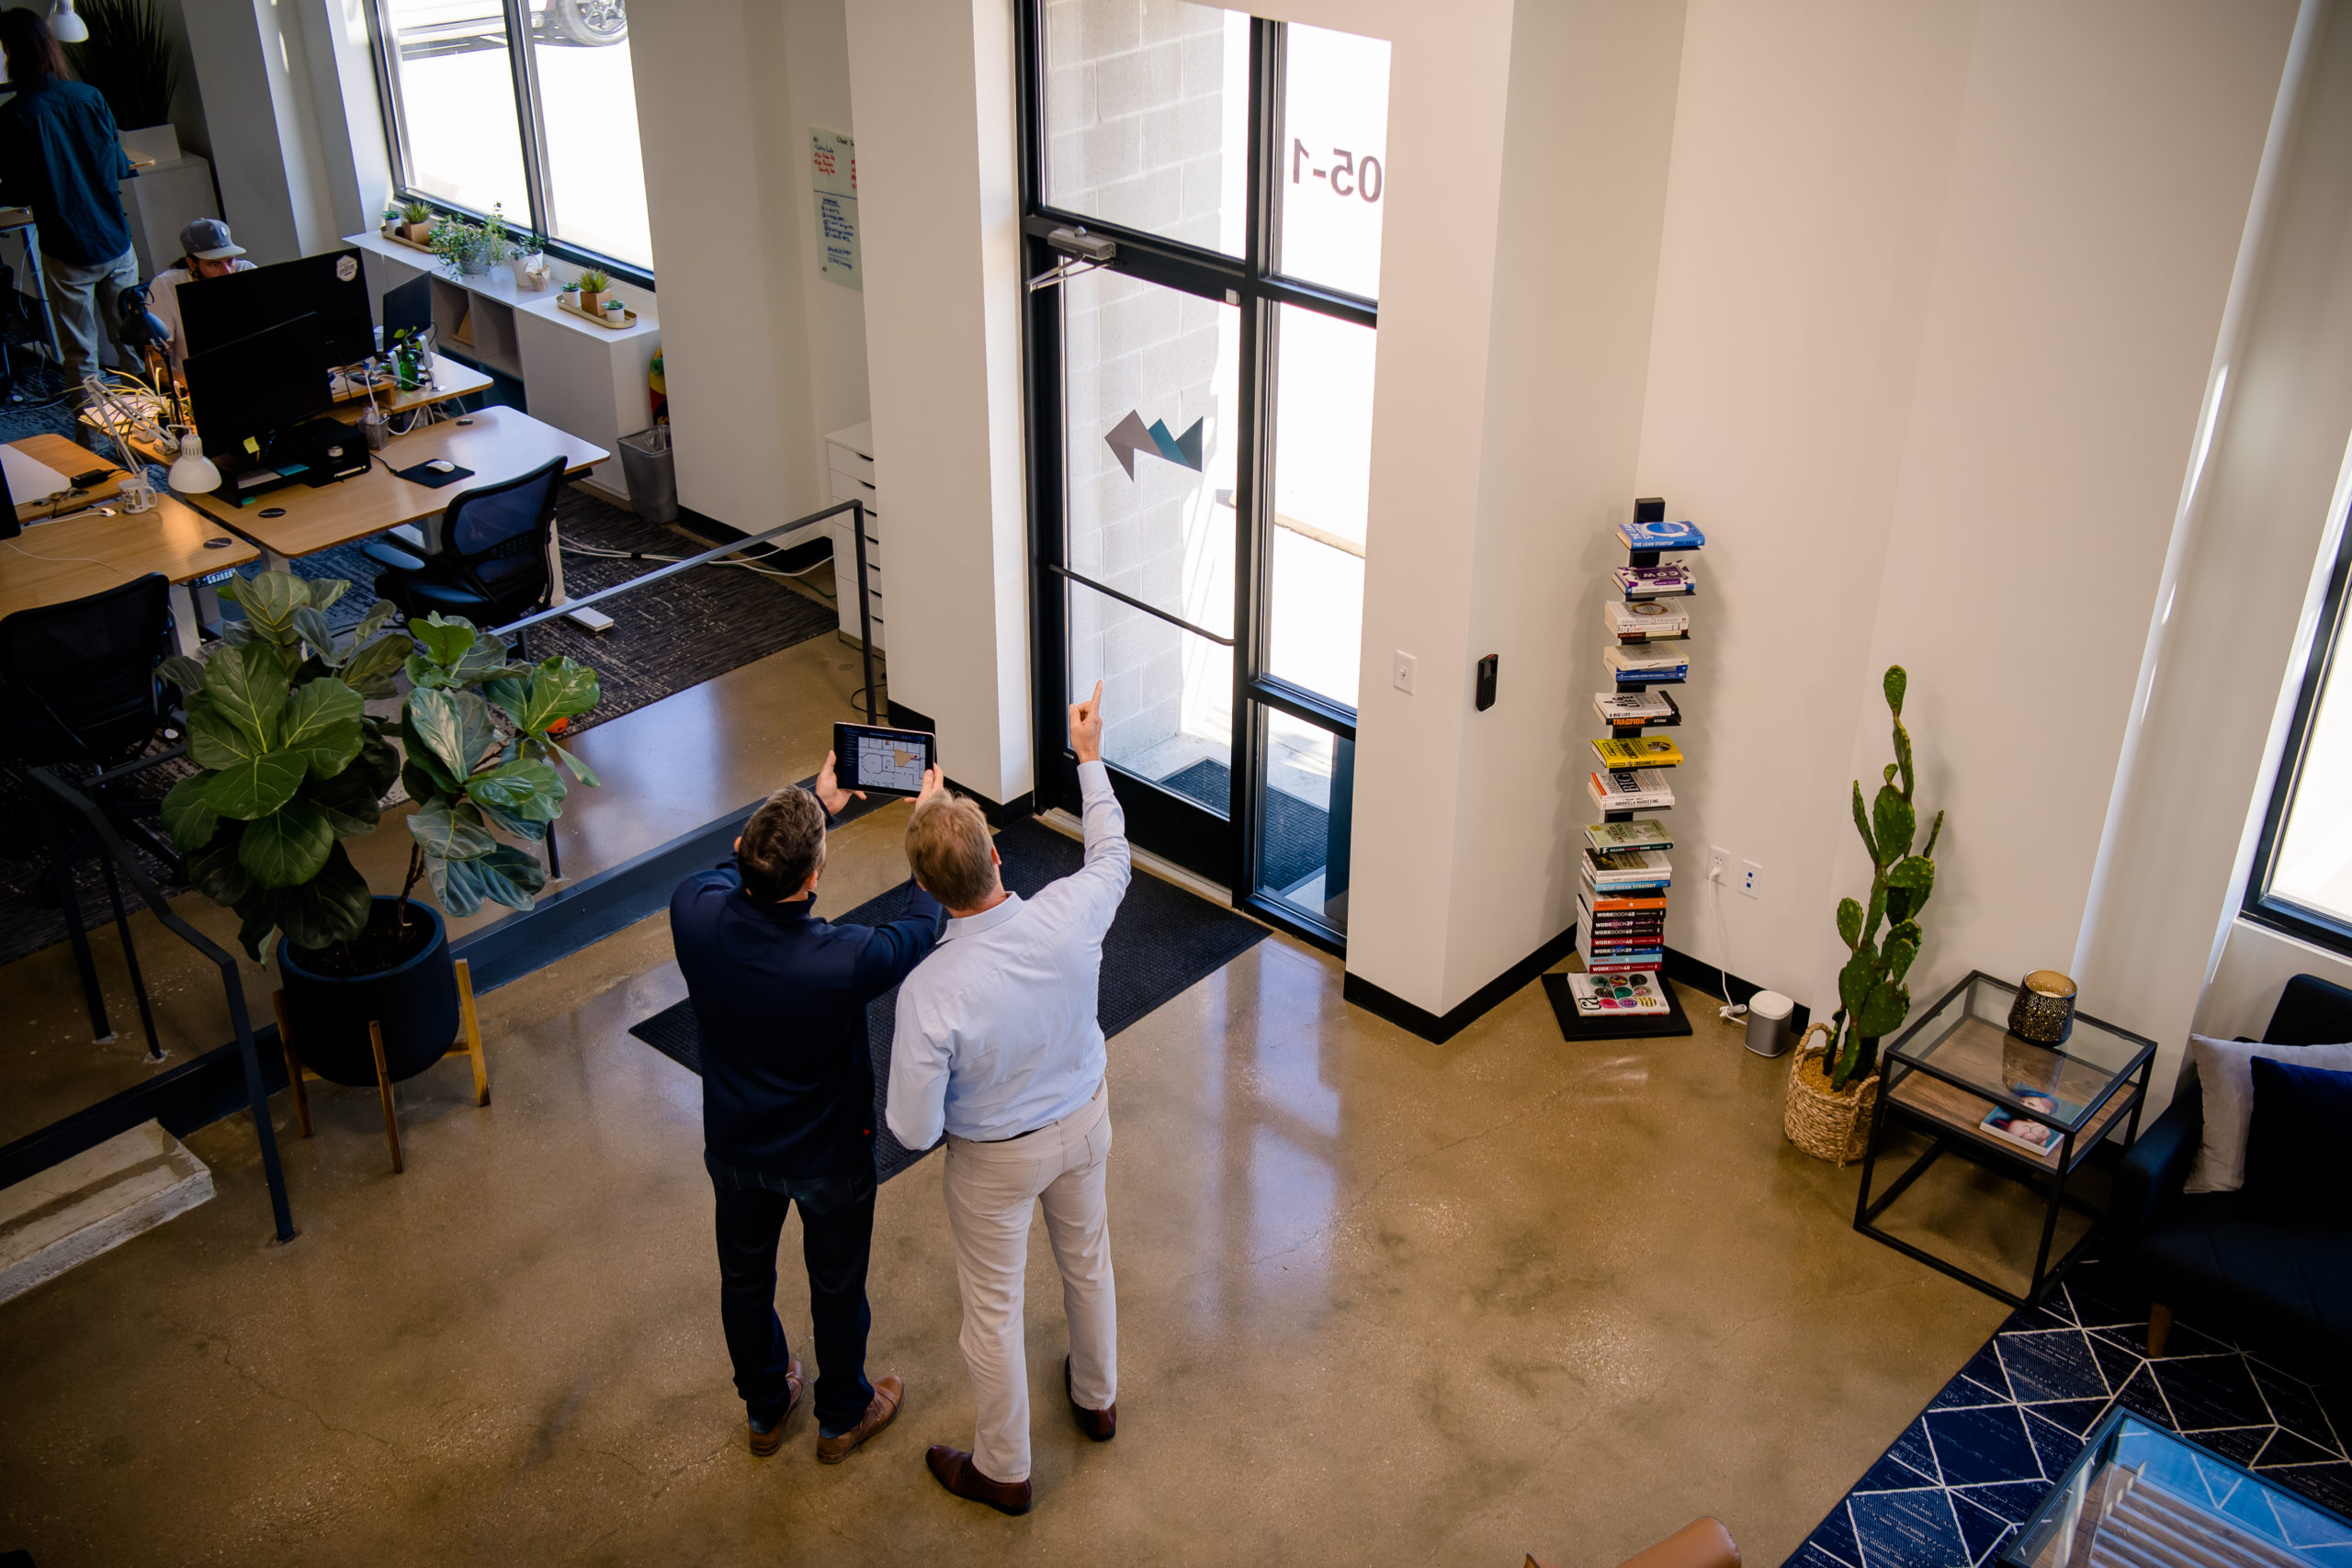
Mistake to avoid: Part of the goal of a thorough site survey is to build trust with your client, showing up with a paper floor plan, yellow pad and cell phone leaves a lot to be desired and does little to establish confidence.
2. Conduct a digital "Site Survey"
As crucial as it is to start with a floor plan or digital map, make sure you don’t skip the site visit, either. A site visit helps verify that what you have on paper matches the reality you see in the building and helps you start designing with your customer or stakeholder.
Walk the site with your customer or stakeholder, visually collaborating with them on where each security device should go by dragging and dropping pre-built element icons into the design. Involving them in this step of the process helps gain their buy-in and trust. Plus, there should be fewer revisions later in the process if they are involved from the beginning.
In some cases, when you conduct the site survey, you’ll be gathering what is already in place. With System Surveyor, you can identify devices, cable infrastructure and systems already “in place” and then switch to “proposed”. Often times, this may be the first time your client or stakeholder has a visual, digital map being created for devices which can become a valuable “digital as-built: for managing the life cycle, not just the procurement of the technology.
New in 2025: Is the ability to add Boundaries or lines that show walls and obstacles. For a video surveillance camera with a field of view or a motion detector that can be blocked, the ability to show the accurate coverage area is vital to your clients. Capture some of the key obstacles on the site walk that are not always on a dated floor plan.
Mistake to avoid: While site walks are not always required, the chances of an accurate estimate go up dramatically which leads to more profitable projects with better margins and most importantly happier clients. An RMA of hardware is an expensive situation for everyone involved.
3. Prepare & set expectations - know before you go
Your site visit has the potential to tell you nearly everything you need to know so you can create an exceptional system design. Do this job right and you’ll more efficiently automate an accurate bill of materials and ultimately execute a flawless install. Like most things in life, planning ahead will help you in the long run.
Spend some time with the floor plan and come up with a physical plan for your walkthrough.
- Where do you need to visit, and in what order?
- What questions do you need to ask while you have eyes on a particular space?
- Are there any aspects of the building floor place or space that are especially unclear or concerning?
One key learning is that the best in the business set expectations before the site survey. They ask for the floor plan, set it up digitally in System Surveyor, have the scale set and let the client know that this walk through will be visual with their input. This gets their attention and helps them to look more professionally with their decisions makers. So, ask them to invest some time with you.
Mistake to avoid: Rushing the site survey and not using the right digital tools to capture photos and ask questions. You don’t need every detail but if you do it right, this ensures a seamless handoff to the engineering and estimating teams.
4. Get clear about the intention of the technology
When conducting an initial site survey for the purpose of planning and implementing an IoT or electronic security system, the key is to ask the right questions. The ability to visualize concepts and capture photos while listening to their security needs is going to set you apart from others in terms of the best system design and proposal.
You may be asking about:
- Why are you looking at a video camera placement refresh? To adopt new technology and AI?
- What types of incident have you seen?
- Is there a complete refresh planned of the access control to move to a new standard or new technology?
- Is there going to be needs for updated cabling infrastructure?
Some spaces (restrooms, offices, residence halls) seem straightforward enough in terms of use case. But asking more questions and making fewer assumptions is the way to go here. Only once you know what each space in an office building or campus is used for can you formulate a comprehensive and truly effective physical security system.
Mistake to avoid: Making assumptions and gathering details in your head.
5. Document existing infrastructure
If you’re upgrading or outfitting an existing system with new or updated security measures and technology, you typically won’t be starting from scratch. Ideally, some of the existing infrastructure may remain. Conduct a physical security audit and document anything electronic that already exists, from access control systems to video surveillance cctv systems, that will be integrated with your new installation. Tools or devices that haven’t reached end-of-life and that integrate with chosen security software or integrated building management system software may be worth keeping.
Even if you’re doing a complete retrofit and refresh, you’ll still want to catalog any physical infrastructure that could be reused. Existing cable runs, mounting points, conduits, power connections, network equipment, and more could save time and money — but only if you know they’re there.
Mistake to avoid: If you earn this customer and plan for a long term relationship but don’t have a digital as-built, you may have to do this time and again. Documenting is powerful for your end user corporate or campus client.
6. Use the Budget Estimator & be consultative
Every project has a budget. Even if there is potential to get more for the project. A great site survey becomes even more impactful when you can begin to help the customer make tradeoffs visually and financially on their security requirements. There are often phases to a project and when people can see what their intrusion detection or video surveillance systems can cover and what may not be possibly within budget, they can do the work to make key decisions with your help.
Help them make tradeoffs visually with a tool like System Surveyor. An easy-to-use Budget Estimator tool will put you in a more trusted advisor position than the competition. It helps you add value and ensure their long term satisfaction. Check out an example of a Budget Estimator that leverage labor and device prices to help define the scope of the project.
7. Get input from vendors & ops team
With the massive influx of AI-based security solutions and cloud-based systems, the ability to keep up with the amount of technology options is daunting. This is where as an integrator or technology manager it behooves you to get visual consultation and input on your technology system design from vendors and engineers. Not everyone is an access control expert or AI video intelligence guru.
Now, getting that consulting by sending over a PDF floor plan via email is like sending a Word document via email, rather than on Google Docs for true collaboration. It’s time to do some digital, real-time collaboration on system designs.
Here is an example of how digital collaboration can look with System Surveyor. Your top vendors will want to work closely with you and you’ll be better served showing the floor plan, photos and details gathered during your site walk all in one place. Invite them in as a Guest User into System Surveyor and come out with a faster and more accurate system design that beats the competition and makes you look like a pro.
8. Provide a professional, clean survey layout
Looking like you use CAD without using CAD is a major secret here. The site survey should ultimately deliver a Site and Survey Layout Report that you can put with your logo, legend and title block. If you are in sales or presenting to a stakeholder, this is a vital deliverable. It’s even better when this is not a complete surprise to your prospect and you’ve been gathering their input along the way per the practices above.
Watch the Reporting with System Surveyor video to see the options for the outcome of your survey layout design and an bill of materials and make a fantastic impression – which leads to winning the project at high value.
Ready to learn more? Watch System Surveyor in 7 Minutes. You’ll get the full picture.